Yesterday,
I revealed a portion of a project.
Today, a tutorial.
(Click on any pic to enlarge.)
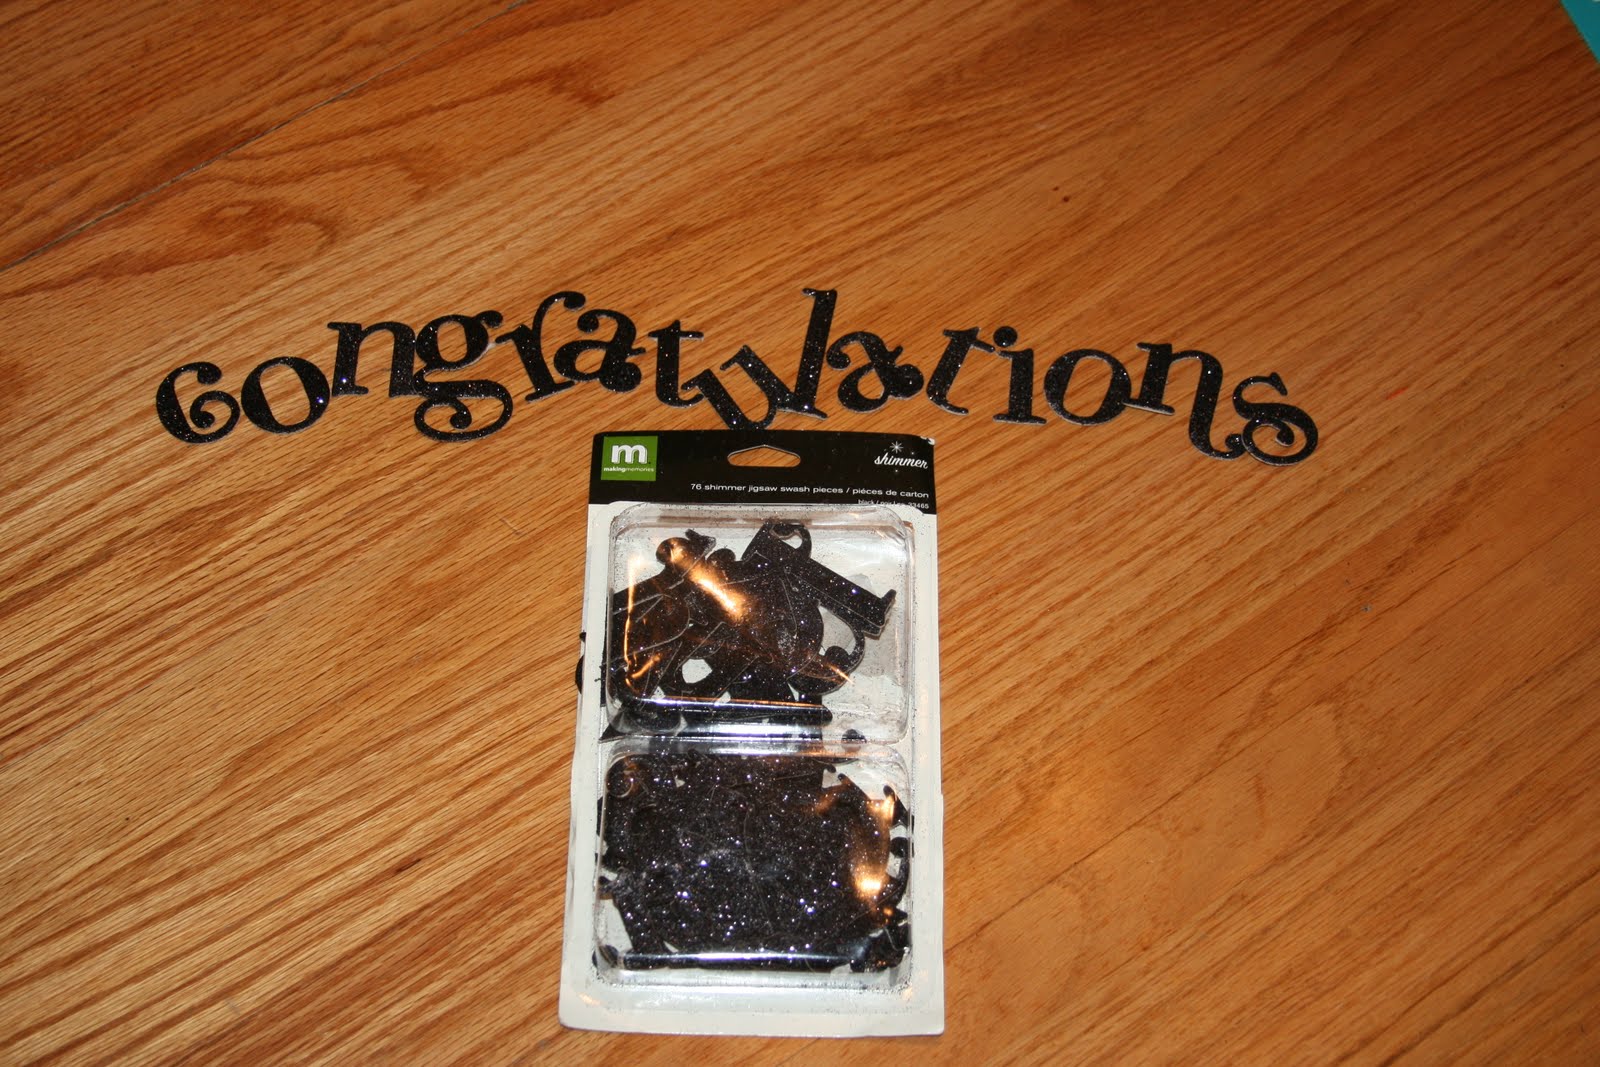
Buy black, glittery chipboard letters at Michaels.

Buy coordinating fabrics at Hancock Fabrics.
I bought 1/2 yard of white cotton,
1/4 yard each of the patterned prints,
1/8 yard each of the solid colors.
I bought way too much fabric.
Note to self:
"Plan project BEFORE you go shopping."
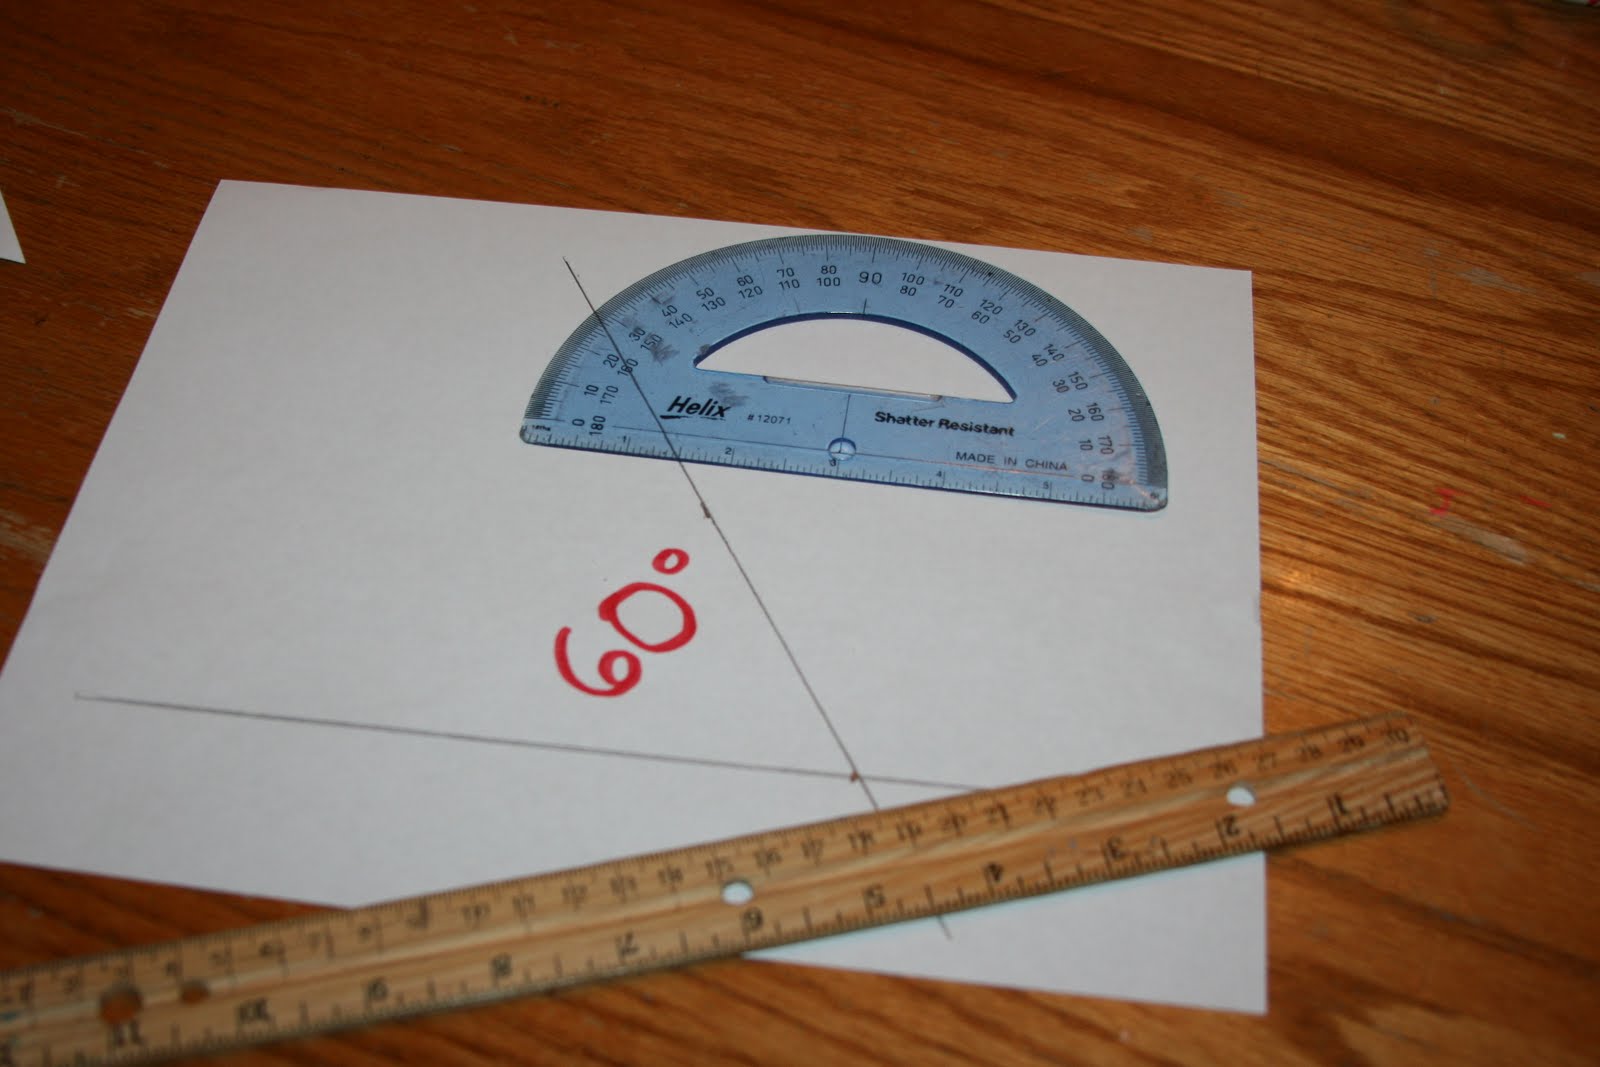
Make a 60degree angle using a
half-circle tool and a straight-edge.
Yea, in Geometry a ruler is a straight-edge.
But, I can never remember which one is a compass,
and which one is a protractor,
so I call this one a half-circle,
and the other one a circle-drawer.

I wanted my triangles to be smaller,
because CONGRATULATIONS
has 17 letters, if I spelled it right.
My dining room table doesn't have SPELL CHECK.
I made the 1 inch tab on top, because I wasn't sure
if I was going to sew them together,
or make a casing and use a string to loop them together.
Remember the note to self about planning ahead?

While cutting and laying out my project,
I made a HUGE mess.
It felt really, really good
to be the one making the mess.

Using a cookbook saver, I read while I sewed.
OK, I tried to read.
I got in a few pages.
I cut out the flower shapes,
two of light pink, four smaller of the hot pink,
handsewing them together in the middle with quilting thread.
I printed out the pattern from a blog MONTHS ago,
always wanting to make them.
Blair from Wise Craft supplied the tutorial,
but I couldn't find the blog again in time
to follow her exact directions.
I also used shrunk her pattern to make my flowers smaller.

I cut rectangles, then just tapered the edges.
When you use a Gingher scissors,
you can cut at least 5 at a time.

Hand quilting thread was used to tie them in the middle.

The leaf was hot glued on the back.
Because I couldn't find enough pink beads,
I put a tinydab of hot glue in the middle
and scrunched.
The scrunchier, the better.
It makes it unravely and more 3-D.

I didn't like the way the triangles met.
It was too trianguly
and made the banner too long.

I liked this better.
At first I was measuring the amount I cut off,
then realized it didn't really matter.
I just eye-balled it and whacked off each end.
At this point, I also decided to pink
the edges of the white triangles, also.

They were connected side by side
by sewing wide Ric-Rac along the top.
Double-stitching at each joint made it extra durable.
The letters and the flowers were attached with hot glue.
The banner was so long,
it was hard to get a great final picture.

Then, you give it to
a beautiful young friend of the family,
in honor of her Graduation.
CONGRATULATIONS,
MELISSA!
It felt so good to be creating again,
the little craft gerbils in my brain are racing.
Inspired by Kristin at
See Mommy Sew,
I want to make two banners -
HAPPY and BIRTHDAY.
Check out her tutorial.
Taking it one step further,
I'd like to also make a
matching table runner
and cloth napkins?
How about
MERRY CHRISTMAS
using vintage linens?
How about
I LOVE YOU
for Valentine's Day?
How about.....
How about....
How about.....
Please share your ideas.
The craft gerbils will be tired soon.
Fresh inspiration is always loved.